


As promised, here is a *quite lengthy* tutorial on how I do hair bows.
What you will need:
ribbon
hair clip
needle and thread
lighter
scissors
yard stick (or some other measuring device)
hot glue gun and glue sticks

You can use whatever kind of hair clip you like.

When CJ was an infant and I would clip the bows on her head bands, I used the alligator clips (second in the picture above). Now that she is older and I put them directly into her hair, I like the other kind (one on top).

The first thing I do is make the base of the bow (if I am doing a base anyway). I like to use the wider ribbon for this. For this bow, I am doing 4 pieces, each 6 inches long. I always heat seal each piece of ribbon before using it in the bow. To heat seal, just run your lighter along the rough edges. That will melt the ribbon a little bit to help it not unravel.

I lay my pieces out on the table before sewing to get them exactly how I want them.

Take your needle and thread (I always go ahead and tie the end of the thread before ever starting the bow making so I can just grab it and go) and run it through the middle of the pieces of ribbon. Pull it taut, wrap the thread around the middle a few times and knot it off in the back.

If you don't like the way it looks, just take out the thread and redo it. At this point, everything can be redone. Once you glue it all together, though...that's it.

For this bow, I went ahead and made a second base.

For the bow, I use the widest ribbon first. If the ribbon is wider, the piece is going to be longer, the narrower the ribbon, the narrower the piece needs to be. I usually cut the wider ribbon around 20 to 22 inches. Don't forget to heat seal the ends.

Cross the ribbon into a crazy eight position.

Take one of the loops and bring it up to the middle.
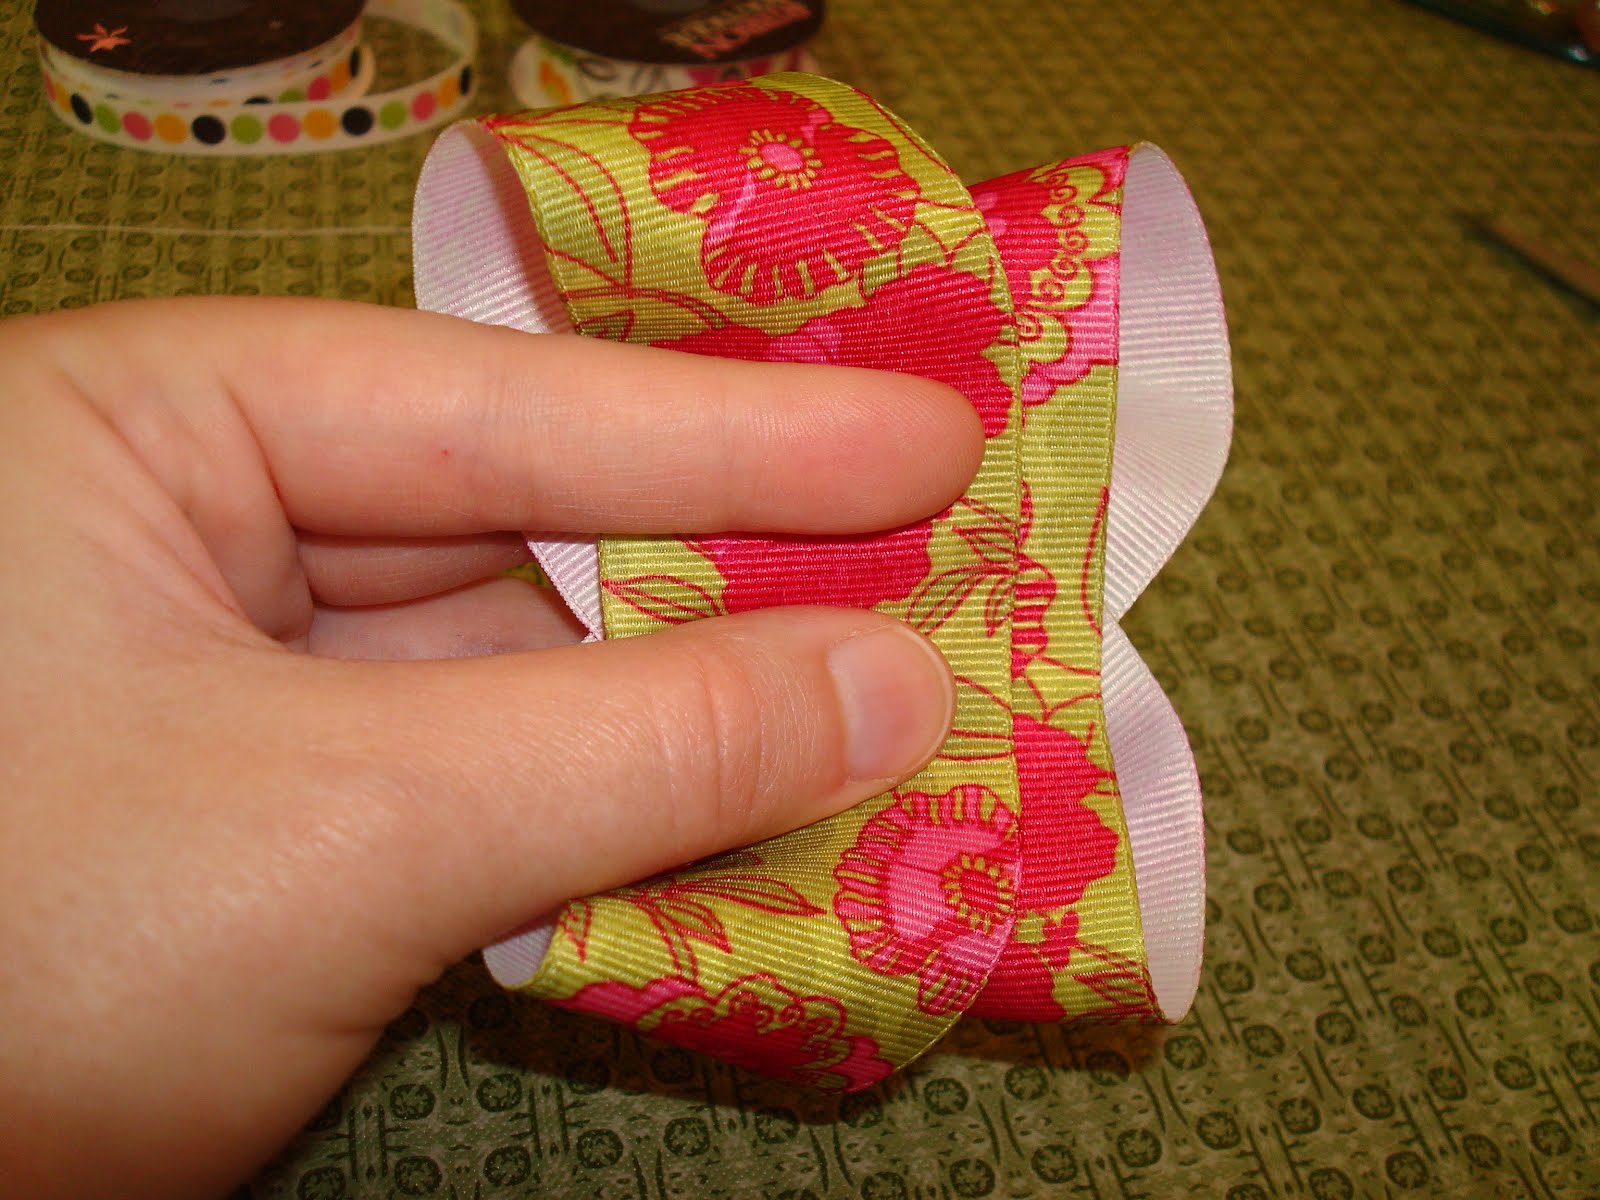
Do the same for the second loop.
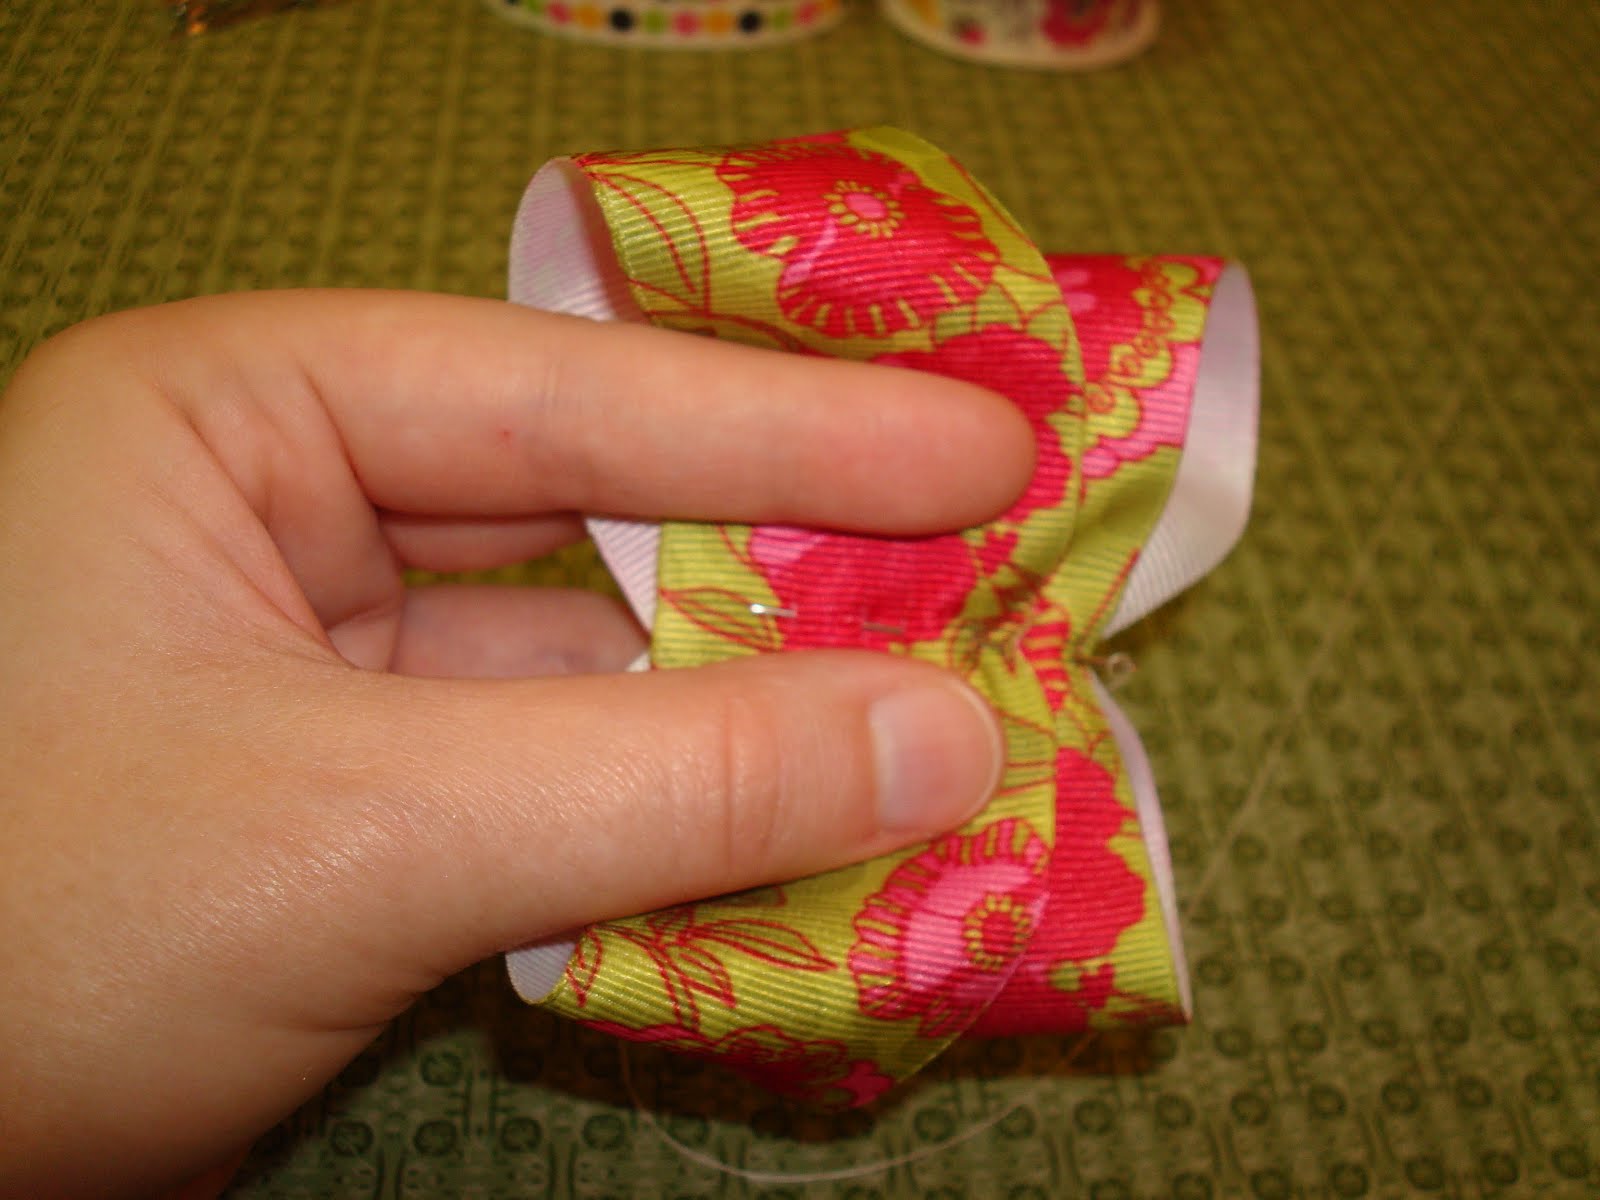
Sew through the middle of the bow and pull tight. Loop the thread around the middle a few times and knot off on the back.

I decided to go ahead and make a second bow with a narrower ribbon.

To make sure I like the bow, I lay everything together before gluing.

Hot glue a narrow piece of ribbon to the clip you are using. If I use an alligator clip, I go ahead and glue the ribbon to the top and underside of the top. It just makes it look a little nicer.

I then cut a small piece of ribbon and made a knot in the middle. I just finagle the ribbon so each end has the pattern on top. You'll understand what I'm talking about when you do it.

Then glue all the pieces together with the ends of the knot coming around the backside and glued to the back of the bow.

Hot glue the bow on to the clip and there you have it! A gorgeous finished, custom bow.

3 comments:
You make it look so easy! lol Very cute!
Super cute and great job explaining!!!im so trying this today for my little girls newborn pictures!!!
Great job explaining!! These are super cute!! I'm so trying it for my little girls newborn pictures!! Thanks for posting!!
Post a Comment